Fun & Friendly. Guiding artists. Building artworks.
Stay tuned for more updates…
Our next class is planned to be held on….
Classes start from only $18/hr Now that’s cheap therapy!
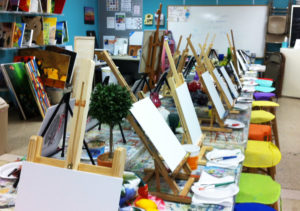
Local classes for local artists
 Here is our tutorial on how to draw faces.. I came up with the original methods in these tutorials by measuring over 12 adult faces, so each tutorial
carries the same measuring techniques.
Please Note: Remember to use a blunt HB pencil for these steps. I used a 4B for clearer viewing. Remember, the darker you go and the harder you press, the more difficult it will be to erase your under-layers/guidelines.
“every portrait that is painted with feeling is a portrait of the artist, not of the sitter. The sitter is merely the accident, the occasion. It is not he who is revealed by the painter; it is rather the painter who, on the coloured canvas, reveals himself.”
― The Picture of Dorian Gray
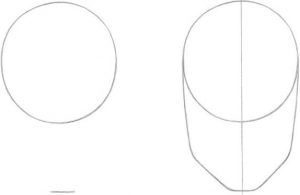
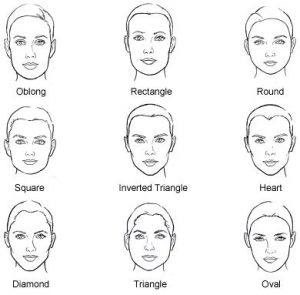
How to Draw Portrait Step 1: Face Shape
First draw a large circle and make a horizontal line below it to line up for the chin. Then start to sketch the jawline. Just draw a vertical line down
the center of the face. Be sure to make sure both sides of the face are exactly symmetrical.
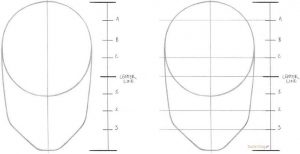
Step 2: Face Guideline
Now you can choose.. Ruler or no ruler. Use the ruler method for the first couple of faces you draw. Why? Because doing this step without it can throw your proportions. You may end up with a “wonky’ face after all your effort of sketching. Especially if you have trouble locating the ‘center’ of an object with your eyes. The no ruler method requires you to split multiple sections of the face in half and then in half again.
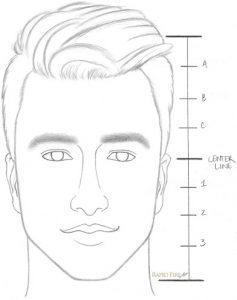
Ruler Method: Make a ruler beside your drawing that is the same height. The ruler should be marked so there are 8 equal spaces. Always start with the center line. Draw faint lines through the face on the markings labeled CENTER LINE, 2, 3, A, and C. As you get used to this, you won’t need to draw the ruler on the side.
No Ruler Method: Without the ruler, I draw lines in this order: CENTER LINE, 2, 3, B, A, C (B is included because it’s easier to break the forehead section in half first, especially when you’re drawing freehand). See the image below:
Step 3: Eyes
On the face, mark the center line with 4 ticks spread equally apart. The eyes will sit roughly on this line. Don’t be afraid to move slightly above or below the line, since eyes are usually slanted.
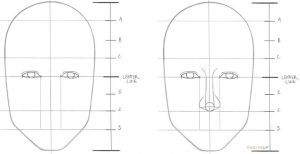
Step 4: Nose
Extend the 2 lines where the inner corners of each eye are located. These guidelines will determine the nose’s width. Now that we have a box, it’s time to draw the nose. Start with a circle, resting it anywhere between line 1 and 2.
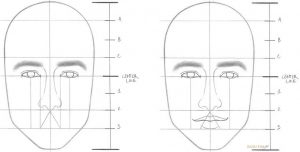
Step 5: Eyebrows
Extend the nose’s bridge past the eyelids to define the brow bone (this step is optional). These lines should be very light!
Using a 4B pencil, draw the eyebrows along the brow bone.
Step 6: Lips
Draw a vertical line down the center of each eye. This will mark the lips’ outer boundary. Click here for my lips tutorial.
If you’ve already read it, place your triangle in the small box under the nose to start. If you drew the nose well above line 2, extend the triangle so the tip touches the nose .
Step 7: Ears
The Center Line and Line 2 mark the general boundaries for each ear.
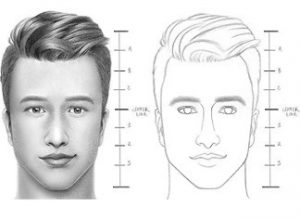
Step 8: Hair
Draw the hairline somewhere in between line A and B. It’s up to you how large you want the forehead to be. To draw a receding hairline, go above line A.
If you have an electric eraser, use it to quickly get rid of all the guidelines that run through your drawing. You can clean up certain dark spots or tight spaces with a kneaded eraser.
Simple and easy tutorial for balance, spacing, proportions. Drawing faces can be much easier just following these simple steps. Remember all faces are different so no need to stick rigidly to these guidelines. Hope this helps the beginners to gain confidence in drawing. Most of all, enjoy your opportunity to create.
“The reason some portraits don’t look true to life is that some people make no effort to resemble their pictures.”
―
From our art classes you can learn the following:
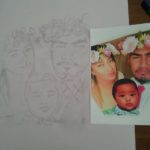
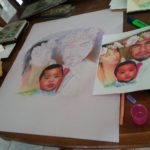
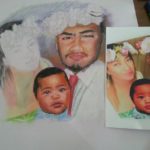
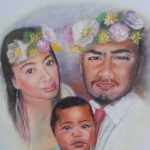
We feature a variety of ages, complexions and expressions. Teaches you how to build form and realistic features, the types of marks and textures produced by different papers, and palettes for creating an array of skin tones and hair colourings.
Step 1
Step 2
Step 3
Step 4
Or, are you already a pastel artist, looking to improve your work by improving your techniques?
There are videos on how to apply pastels, how to crosshatch and blend colours, colour theory, how to create under paintings with acrylics and much more.
Discover a fast and easy way to bring your drawings to life. Achieve a level of realism that few artists will ever reach.
Pastel techniques that are revolutionary, fun and super easy! Using quality pastel art products from The Art Shed, we craft amazing artworks.
Designed for beginners considering using pastel for the first time, for experienced artists who may feel uninspired, and for anyone in between, the skills you will gain with us, will help you build confidence and open your world.
Explore the unique joys of pastel portraits.
regards,
Steve Gosden.
Quality Pastel art supplies available from:
https://www.artshedbrisbane.com.au/catalogsearch/result/?q=pastels
Acrylic or Pastel portraits A3:
$99.50$49.90+GST per face.Oil portraits A3:
$189$99.90+GST per face .Extra faces: 80% extra first face, 50% ea extra 2 faces or more.Postage available for extra cost.
Fun & Friendly. Guiding artists. Building artworks.
Stay tuned for more updates…
Our next class is planned to be held on….
Classes start from only $18/hr Now that’s cheap therapy!